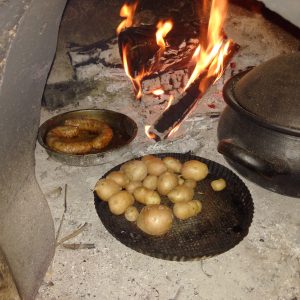
Our communal stone open cabana or quincho provides facilities for small and large barbeques as well as a designated area to cook on an open fire. As a rule, we mostly use this area.
Here are some recipes to help inspire you:
Main dishes: Mo and Lucy’s special dishes (your hosts)
- Mexican style beans and refried beans:
- Gazpacho
- Paella,
- BBQ chicken kebab ( Persian style)
- Lamb in almond sauce
- BBQ pork and sausages
- BBQ steak
- Fish on fire
- vegetable ratatouille
- Refugio Fini Chico special egg breakfast
- Lamb seco ( dried lamb)
- Pizza in the clay oven
- Bread in the clay oven
- Fruit Crumble
- Apple Cake – a firm family favourite
Mexican style beans and refried beans:
We have been cooking beans on almost a daily basis for some 30 years and after all those years our children and friends always say that their beans never taste quite like ours.
It is simple – just get yourself a bag or more of dried red or white beans from any supermarket. In addition you will need some salt, cumin, or wild thyme, black ground pepper, a small onion , few garlic cloves and a couple of spoonfuls of olive oil.
Depending on how many you are and how many days you want to leave the beans afterwards in the fridge choose the quantity you need and soak them for a few hours or overnight. Then rinse them and use the black clay Colombian pots if it is for the oven outside or a pressure cooker if you are cooking inside on the hob.
If it is for the oven outside then put all the ingredients together in the pot. Fill with water to about 3 inches above the beans, put the top on and stick it in the oven and close the door and forget about it until breakfast the following morning. Do not worry if the beans have too much water in the morning. You can quickly boil it in a pan on the gas in the morning and get rid of the excess water. This is preferable to burnt beans and pot! After several times you will get it 100% right!
If you are going to cook on the gas inside then put the same ingredients and water in the pressure cooker and bring it to the boil, lock the pressure cooker and boil it on a low gas for about 30 minutes. Then turn it off and leave for 10 minutes or so until it cools down before you take the top off. Never try to take the top off the pressure cooker when it is still boiling and has pressure in it. You could do real damage to yourself. Alternatively if you are in a hurry put the pressure cooker under cold water for a minute until you hear it release the pressure then you can open it.
You can then have it for various days; for your breakfast with eggs, as a side dish for your lunch or simply our favourite dish for lunch – Serve with plain rice and salad.
Refried beans:
In Mexico often for breakfast they ask you if you want your beans normal or refried!
If it is in the morning I always say refried. Mash your cooked beans with a masher in a saucepan, you can either pass it through a sieve or as we do just pour the beans into a frying pan, add a couple of spoonfuls of olive oil and keep moving until the water evaporates then keep moving it with a wooden spoon until it becomes a paste. You now have refried beans and it’s delicious. Use it anyway you like.
Gazpacho
This is the perfect recipe for summer in the refugio as all the ingredients are easily available and in abundance. It is served cold and is perfect for when you are feeling hot!
You need about 6 average sized ripe tomatoes. You then need to peel them which sounds fiddly but is actually quite easy to do. Then peel and chop up a cucumber – could be 2 if they are the small locally grown ones, also a green pepper – get rid of the seeds and chop, 2 or 3 garlic cloves, half an onion, about 2 tablespoons of red wine vinegar, around 100g fresh breadcrumbs, 3-4 tablespoons nice olive oil, salt, pepper to taste, maybe a teaspoon of sugar which helps bring out the flavours.
All of this needs to be liquidised together with ice cold water – best to do in small batches, adding water as you go. When it is all liquidised taste and see if you need more seasoning, vinegar etc, then put in the fridge until people are ready to eat.
3 Paella
This is my way of making it, but I’m sure you can find other ways online too.
The basic ingredients: (for 6 people);
A medium sized fresh fish. You can buy fish in any of the larger supermarkets. If you buy it from a supermarket they normally clean it for you and give it back to you as filets and bones in different bags. Just tell them you want it in filets plus the head and bones and if you can buy a few spare fish heads that would also be useful.
Gambas (uncooked prawns) x 12
A kilo of mixed shellfish
Lomo: (this is available in all supermarkets in all villages and is relatively cheap. This is pork fillet).
Chicken pieces,
Herbs such as cumin, thyme, saffron or mixed herb paella packs you can buy in any supermarket
Add onion, garlic, salt and pepper and if you have one, a large green or red pepper would be nice too.
A pack of rice. You can use any kind of rice really but if you see some fat white rice on the shelves with Paella written on the packet then buy that.
Preparation: I prefer to cook on an open fire although you can cook this in the oven instead, but it’s much more fun on an open fire.
A few hours before you want to eat, put the fish head and fish bones in a pan with water and boil them for half an hour or so to make a tasty stock. I normally mix all my herb and salt at this stage. Then let it cool down a little bit and strain it. Keep the stock to one side until later.
Put the paella pan on the fire and pour in several spoonfuls of olive oil. Be generous with the oil and when it’s hot add the chopped pork filets in small pieces and then the chicken pieces that you have already cut into small pieces and keep moving the mixture. Do it until they change colour and then add chopped onion, garlic and pepper if you have any. Give it a couple of minutes and then add the fish filets and the gambas/prawns. Move it several times for about 5 minutes but do not over stir as the fish may fall apart. Now make sure the fish and meat are equally distributed in the pan.
Add the fish stock if you have enough to cover all the meat and the fish and if you do not then normal warm water is fine with your herbs and salt etc. Pour the bag of the rice equally in the pan so that everything is covered with rice. Stir very gently. The water should cover all the rice. Bring the heat down to the minimum by moving the hot embers or coals to the corners. (If you remove a log do please remember to run it under cold water immediately so that it does not become a fire hazard).
Cook for a few minutes and then add your shellfish by arranging it into the rice. It will take roughly another 20 minutes depending on your taste and how you like the rice and consistency. If it gets too dry just add water until it is cooked.
When you serve make sure each person gets a good mixture of everything.
Now all you need is a squeeze of fresh lemon and of course a glass of cold white wine.
Bon apetit!
5- BBQ chicken kebab (Persian style)
This is one of the dishes I used to have in Iran as a child and when I went back to Iran after 44 years and I ate the chicken again I realised how different it was from the BBQ chicken we have in the UK and so much tastier. Here’s how to cook it:
Cut your chicken pieces into small pieces. Try to buy corn-fed chicken which is available from supermarkets or organic chicken otherwise use what you can get locally.
For a family of four one chicken or say eight pieces of chicken should be enough to feed a hungry family. If it is a whole chicken then chop it into pieces.
Then get a whole lemon, salt, pepper, spoonful of natural yogurt and if you can find a bit of saffron and couple of spoonfuls of olive oil. Mix them all together well and then marinate the chicken bits for about 24 hours if possible, otherwise however it suits you.
Get your fire red hot (ember hot). Place the chicken bits in the middle of BBQ grid and make sure it is secure and locked both ends. Then put it several inches from the embers. Turn over the grid every few minutes to cook both sides until your chicken bits look nice and golden. It should take about 20 minutes or so. Then serve them with plain rice and salad, or with pita bread or simply have it as tapas.
If you have any of your marinating mix left then use some branches of mint and keep brushing the chicken with it each time you turn it over. This keeps it fresh and stops it drying out.
Bon appetit!
7- Lamb in almond sauce
In my native country of Iran, lamb and almond sauce is one of the winter favourites of our household. It is a very simple but delicious dish and is best served with rice.
For four people you need approx half a kilo of lamb cut into pieces, a few garlic cloves, one large chopped onion, cumin, salt, black pepper, a couple of chillies, fresh or dry, about 200 grams of untoasted finely ground almonds, a spoonful of tomato puree or a can of tinned tomatoes .
Heat 2 tablespoons of olive oil in a casserole dish. Add the lamb and fry until browned on all sides. Then in the same pan add garlic, onions salt, pepper, cumin and chillies and stir until the onions start turning colour.
Add enough water to cover everything plus a couple of cms. Cover and simmer for 1 hour, stirring now and then. Then add the ground almonds and cook uncovered, stirring often, until the sauce has considerably reduced and becomes creamy. This should take about 10 minutes.
Serve with rice and do not forget a glass of red wine!
8- BBQ ribs and sausages
If you have the outside oven hot, then put the spare ribs into a baking pan and put them in the oven. If they are not seasoned then you can do your own, often some rough salt made into a paste with lots of garlic is good enough. Depending on how hot the oven is, it could take anything up to two hours to get them nice and crispy (make sure you leave the oven door a third open, otherwise it will go out.)
You can add the sausages to them to cook for about 20 minutes and then serve them together with salad, potatoes or whatever you fancy.
Alternatively if you are using the BBQ, then make sure your fire has burnt down sufficiently so that there is no flame. Put the spare ribs on the top shelf and let them sweat and cook gently. It could take half an hour each side, add the sausages to the lower level about 20 minutes before you eat and then serve them together. You can also make your hot sauce at the same time on the BBQ.
9- BBQ steak
There is nothing easier than BBQing a t-bone or any kind of steak, but often people get it wrong making it burnt outside and raw in the middle or raw all the way through.
We like our steak well cooked but nice and juicy inside. I always tell my son a good fire for a steak is when you put your hand on the fire (the same distance that you are putting the meat on) and count till 10 (10 seconds) and if your hand starts burning by 10 then it is a good fire. Quite contrary to fish, steak should be turned once every few minutes. Depending on your taste, it could take up to 20 minutes. You can always stick your knife into it and then you know how well cooked it is
We have this bad habit of serving it with chips made in olive oil and a fresh salad and a good bottle of red wine!
Bon appétit!
10- BBQ whole fish
Crush several garlic gloves and make into a paste, add salt, pepper, juice of a fresh lemon and several spoonfuls of olive oil. Mix well and then brush it over both sides of the fish before you put it on the fire. Keep brushing it every now and again once it is on the bbq.
Cooking meat is relatively easy as you can turn it over as many times you want and if it is not cooked enough you can always return it to the fire, but with a whole fish, you have only one chance to turn it and if you do not get it right the first time, then you are in danger of the fish falling apart. Make sure you get your heat on BBQ ready (It is good if you could get your fire a bit less hot than 9 above) and then leave your fish to cook for about 30 minutes each side (obviously this will depend on the size of the fish). Take care when you turn the fish over. Ideally you need two flat spoons or slices so that you can turn it over without it falling apart.
Again, you can serve this with rice, fresh salad and some lovely cold white wine.
Bon appétit!
11-Ratatouille
This is great to eat on its own with fresh bread for a light lunch. It also works perfectly as a vegetable side dish with barbequed meat or fish, but as well as this it can be used as the base for any kind of meat stew.
Here’s how:
Heat up some olive oil in a large frying pan. Add sliced onion and garlic and fry until soft. Then transfer to a large saucepan.
Slice 2 or 3 courgettes – If you have marrows instead then it’s best to peel them and possibly remove some of the seeds. Fry these in the frying pan until golden on both sides and add to the saucepan.
Peel and slice a couple of aubergines – make sure the oil is hot when you add these otherwise they will just soak up all the oil. Fry until soft and add to saucepan.
Halve and slice 2 or 3 peppers – can be any colour, fry briefly in the frying pan and then add to saucepan.
Cut up and slice fresh tomatoes – say around 5-6 medium to large ones and add to the saucepan.
Season with salt and pepper and you can also add some wild thyme at this stage. You can also add tomato puree now which helps to build up the flavours.
You now need to simmer the sauce for about half an hour. Taste again, it may need more olive oil or other seasoning. That’s it – simple and very tasty.
12-Refugio Fini Chico special egg breakfast
This dish was one of my favourites in Iran and we later discovered almost the same dish in Colombia but there it is called Perico.
Chop several juicy tomatoes into small pieces, half an onion, a few cloves of garlic, salt and pepper and a fresh hot chilli (Be careful if you are cooking for children who are not used to chillies). Heat several spoonfuls of olive oil in a frying pan and add the mixture. Stir well and then turn the heat down to minimum and leave covered for about 20 minutes until the tomatoes and other vegetables become almost creamy.
Depending how many you are, break an egg for each person into a different part of the pan. Add a pinch of salt to the eggs and cover for about two to three minutes until the whites are cooked. Serve with toast and coffee!
13– Lamb Seco (dried lamb)
What a simple and delicious dish this is. I learnt how to cook this many years ego in Cuba and it has become one of our all time favourite dishes.
Buy half of a leg or shoulder of lamb. Rub it well with a paste of garlic, cumin, salt and pepper.
Put it into pan and add pour couple of spoonfuls of cider vinegar or sour orange juice and if you do not have either of these, then a couple of spoonfuls of ordinary vinegar. Place on a low heat and cover. Leave the meat to sweat and cook for 4 to 6 hours. It does not need any water. You will see that the meat releases lots of water. When it is cooked it will fall part in the pan. Serve it with rice and salad. Delicious!
14- Pizza in the clay oven

Making pizza is fun and children taking part makes it even more fun!
As a general rule each time we bake bread in the oven we make pizza too. This way we make the most of the wood but also use the same bread dough for baking bread and making pizzas.
Assuming you have made your dough (see baking bread below), then the most time consuming part is making the sauce. People often just put lots of canned tomatoes in their sauce and top it up with salami, cheese etc. But a real pizza should have a proper tomato sauce and to do that is a bit time consuming.
Making the sauce:
A good sauce takes lots of tomatoes, pepper, garlic, herbs and whatever other vegetables you can find in the garden or in your fridge. We even put marrows and aubergines in the sauce.
Chop all your vegetables (except tomatoes) including a good size onion and slowly fry them in some olive oil. When they are all cooked, add the chopped tomatoes. Mix well and cover your pan. Turn the gas to minimum and leave to cook slowly. It will take a minimum of one hour. If all the juice finishes before everything is well cooked then add a bit of water from time to time. Remove from the heat and let it cool down completely before liquidising it into a creamy sauce. This is your base. You can make more than you need for pizza and keep it in the fridge and have it with other food such as pasta or use it when you are cooking chicken or meat.
Now the pizza
You can use a pizza tray which you will find in the cottages or you can put the pizza directly onto the pizza peel and into the oven. If you are not used to making pizza this way, then I suggest using the trays.
Use dough as you wish depending on whether you like it thick or thin and using the flat surface by the oven, flatten your base, using flour on the surface to stop it sticking. When it is fully stretched lift and place it into the previously oiled pizza tin. Shape it nicely and then cover it well with your tomato sauce. Decorate with everything you like; salami, mushrooms, peppers, chorizo, hot chillies and then cover it generously with mozzarella cheese and put into your hot oven. I often push all the flames to the end of the oven and then add a few pieces of thin wood. This creates sudden heat which the pizza needs. Shut the door to about 75% and leave for about 10 minutes. Have a look if it is done the way you want then pull it out. If it’s not ready then keep it in there until it is nice and crispy. It’s fun letting children do their own toppings.
Remove the pizza from the tin plate and put it gently on a wooden chopping board and with the help of pizza cutter cut into slices.
If you have small children around you can now ask them a question while they are eating it:
” What’s square in a box, round when out of the box and triangle when you eat it?” I bet none of them will come with a quick answer!
Of course you can always make your pizza in the gas oven inside too, but it’s not as much fun!
15-Bread in the clay oven
I am sure everyone has made bread at some stage of their lives. I myself was in charge of bread making when I lived a small community in Cornwall during the ‘70’s. We had no electricity or gas and the only way we could bake was using an old Aga which we had inherited from the old farmer. But our bread was always perfect as the Aga would keep a constant temperature so that the bread would bake nicely, golden outside and well baked inside.
I never use any fixed measurements when I bake. Basically put the yeast in a bowl of warm water. Leave it for half an hour, then add a spoonful of sugar, dollop of butter, a bit of salt and then add the flour and knead it until it is nice and smooth. Then leave it to the side of the aga or somewhere warm until risen. Then knead it again and place it in several bread tins. Leave to rise again and then stick it in the oven for 45 minutes or so. Always leave it to cool off before cutting it.
These days I still use the old method but using olive oil and dried yeast instead of butter and sometimes we add garlic, crushed walnuts and almonds, even chopped onions so that we get a variety of bread.
So the main points to remember are:
Mix the flour, salt and yeast in a large bowl
Tip the dough onto a lightly floured work surface and knead it until the dough becomes really smooth.
Place it in a lightly oiled bowl to prove.
Knock back the dough, then gently mould it into a ball and into the bread tins.
However if you are the type who needs everything scientifically measured and improvising and risk taking is not your game, then here are some suggestions:
Ingredients and baking method:
1 kg of strong white bread flour, or brown flour. We often mix half and half, plus a little extra flour for finishing
Several teaspoons of olive oil and a bit of butter
20 g sachets fast-action dried yeast
2 tsp salt
About 600ml tepid water (warm not cold – about body temperature)
Put the flour into a large mixing bowl and add the butter. Add the yeast at one side of the bowl and add the salt at the other, otherwise the salt will kill the yeast. Stir all the ingredients with a spoon to combine.
Add half of the water and turn the mixture round with your fingers. Continue to add water a little at a time, combining well, until you’ve picked up all of the flour from the sides of the bowl. You may not need to add all of the water, or you may need to add a little more – you want a dough that is well combined and soft, but not sticky or soggy. Mix with your fingers to make sure all of the ingredients are combined and use the mixture to clean the inside of the bowl. Keep going until the mixture forms a rough dough.
Use about a teaspoon of oil to lightly grease a clean work surface (using oil instead of flour will keep the texture of the dough consistent). Turn out your dough onto the greased work surface (make sure you have plenty of space).
Fold the far edge of the dough into the middle of the dough, then turn the dough by 45 degrees and repeat. Do this several times until the dough is very lightly coated all over in olive oil.
Now use your hands to knead the dough: push the dough out in one direction with the heel of your hand, then fold it back on itself. Turn the dough by 90 degrees and repeat. Kneading in this way stretches the gluten and makes the dough elastic. Do this for about 4 or 5 minutes until the dough is smooth and stretchy. Work quickly so that the mixture doesn’t stick to your hands – if it does get too sticky you can add a little flour to your hands.
Clean and lightly oil your mixing bowl and put the dough back into it. Cover with a damp tea towel or lightly oiled cling film and set it aside to prove. This gives the yeast time to work: the dough should double in size. This should take around one hour, but will vary depending on the temperature of your room (don’t put the bowl in a hot place or the yeast will work too quickly).
Once the dough has doubled in size scrape it out of the bowl to shape it. The texture should be bouncy and shiny. Turn it out onto a lightly floured surface and knock it back by kneading it firmly to ‘knock’ out the air. Use your hand to roll the dough up, then turn by 45 degrees and roll it up again. Repeat several times. Gently turn and smooth the dough into a round loaf shape.
Place the loaf onto the lined baking tray, cover with a tea towel or lightly oiled cling film and leave to prove until it’s doubled in size. This will take about an hour, but may be quicker or slower depending on how warm your kitchen is.
Preheat the wood oven to quite hot (425F/Gas). Put an old, empty roasting tin into the bottom of the oven.
After an hour the loaf should have proved (risen again). Sprinkle some flour on top and very gently rub it in. Use a large, sharp knife to make shallow cuts (about 1cm/½in deep) across the top of the loaf to create a diamond pattern.
Put the loaf (on its baking tray) into the middle of the oven. Pour cold water into the empty roasting tray at the bottom of the oven just before you shut the door – this creates steam which helps the loaf develop a crisp and shiny crust.
Bake the loaf for about 30 to 45 minutes depending on your temperature.
The loaf is cooked when it’s risen and golden.
16- Fruit Crumble/Pie

You can use any fruit for this – of course you can combine fruits too though remember if you use mulberries they have a very strong flavour so may mask other fruits you mix them with.
Just prepare the fruit – depending on what it is – wash it, add sugar to your taste – apples and pears I would peel and chop up fairly small and put in whatever dish you are using – should come to about halfway up the dish.
For the topping I mix equal quantities of butter, brown sugar, and plain flour plus ground almonds – this produces a rich buttery topping – you need to mix all these together with your hands – up to you, you can add cinnamon or mixed spice or ginger if you fancy it. It should end up as clumps of mixture – obviously the butter needs to be soft so take it out of the fridge half an hour or so before you start.
I also sometimes add oats or add some muesli type cereal that needs finishing; it’s always tasty in the end.
Then sprinkle the topping over the fruit and cook in a medium oven for approx just under an hour – again, depending on what fruit you are using – apples, pears etc will take longer to cook than soft fruit.
17- Apple Cake – a firm family favourite
You can use any sort of apple here – cookers or eaters.
Cream together 170g of soft butter with 170g sugar until fluffy. Beat together 2 eggs and mix with butter and sugar mixture, then gradually fold in 170g self raising flour.
Mix approx 60g Demerara sugar with generous teaspoon of cinnamon. Butter a round cake tin and pour cake mixture into it. Sprinkle half the sugar/cinnamon mix over the top of the mixture. Peel a large cooking apple or a couple of eating apples and cut into thin slices. Place these on top of the mixture in a circle, slightly overlapping but also leaving a bit of space here and there. Sprinkle the remaining cinnamon/sugar mix over the slices.
Melt a good knob of butter and pour this evenly over the top of the cake
Put into medium pre-heated oven for approx 30 minutes.
Heavenly…..