Honestly, there is nothing easier than making a clay or a brick oven. There are so many ways and shapes that you can invent. During the last 35 years of my non-stop travels I have seen so many Ovens. In my birth place in the heart of Iran, we had ovens everywhere. Some verticals directly in the middle of the seating room used during the winter for heating the room as well as cooking beans and head of a sheep, and some 45 degrees outside for making nans or commercial bread ovens delivering dozen of flat bread per minute.
Then I started seeing ovens in Mexico, Peru, Bolivia and all over Latin America. In fact if you ever got o Cusco in Peru, almost every restaurant has a clay and brick oven. In the nearby village of Pisaq, you will see commercial clay ovens capable of roasting the entire pig at one go.
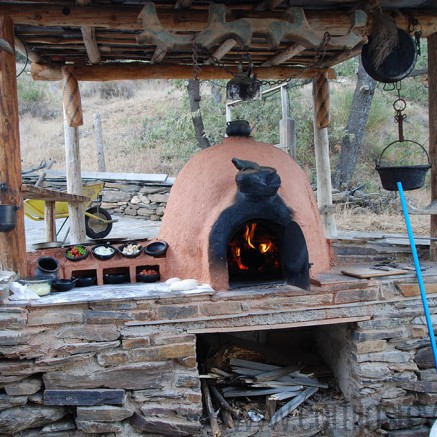
I have made ovens both on our farm in Chile and in Spain. The photos you see here all belong to Spain.
I will give you some simple clues and the rest depends on you:
1- How to prepare the base
2- How to shape the oven
3-where to put the chimney
4- what material to use
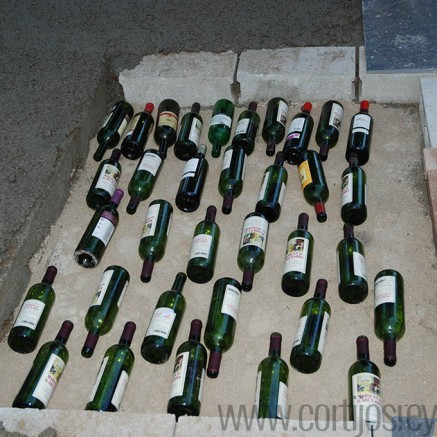
Stage 1: Preparing the base is the key issue. Clear a flay area of some 1 meter square, making sure it is totally flat.
use a mixture of fine sand and saw dust to create a soft bed. Get yourself lots of empty bottles ( later they help to keep the heat for a long time). fill the gaps with more sand and saw dust till all bottles are covered.
At this stage you should have covered to the height of one of the two bricks you are using.
Now gently cover it very tightly with more fire bricks, making sure no sand or earth remains between each brick.
This will be your base of your oven.
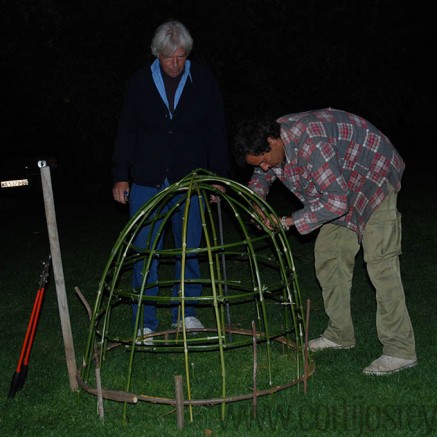
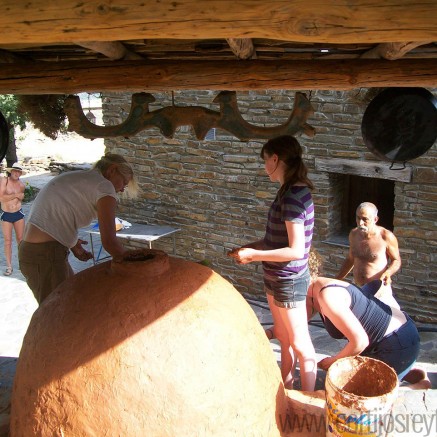
Stage two: Preparing the shape of your oven. I used bamboos that we have on the premises to shape the oven.
or alternatively, if you have ever made a sandcastle or sand dome on the beach or even moulded a basic shape using either clay, plasticise, play dough etc, then you have the skills to do the job.
you can use kind of damp sand and create the shape. Then cover it with plastic so that the bricks or clay does not interfere with the sand.
For the door, I asked the local ironmonger to make us a gate, but you do not have to have this. You can cover it later on with a piece of metal cut into shape.
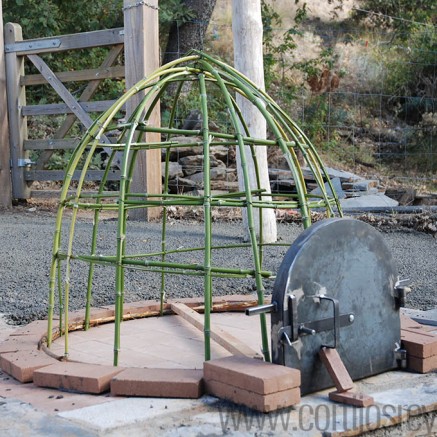
Stage 3: now that you have sorted the base and the shape, then start building the gate and allow for the chimney. You can leave a hole right in the middle or even better just above the door of your oven. If you have anything stick a pipe and leave there.
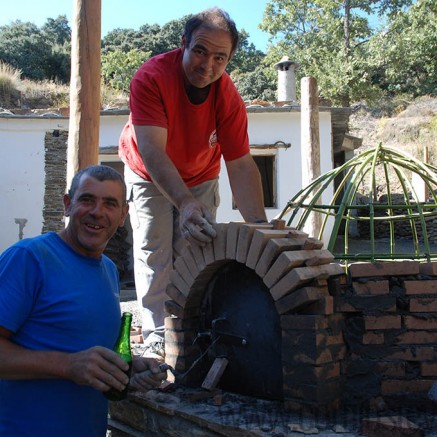
stage 4: Well what material to use. You can use oven bricks and then cover it with clay or use only clay. In Spain we used bricks and then cover it with a good mixture of clay and hay mixed up. You can also mix your clay with animal hair ( goat..anything). You could also use 5 parts clay and one part sand before you apply it. This often helps not to crack the oven after firing.
Now that your oven is finished. If you used bamboo then by firing it they will all burn out. If you used sand, then use something round and pull out all the sand.
When you fire for the first time, be gentle and light it gradually ( not too hot), make sure you have it burning for some 24 hours and then at the end you can fire it real high.
Have fun!